I decided to do a couple things a little differently for these cages. I have been trying to deal with the weight of a solid melamine cage for some time. I really like using this material, but several of my cages I am unable to move by myself.
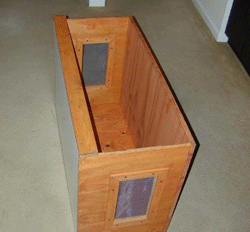
For this cage I decided to use a melamine bottom and use plywood for the rest of the construction. I also went a step further and used 1/2" plywood for the sides and back of the cage further reducing the weight.
I felt it was best to go ahead and use 3/4" for the top to avoid problems with sagging.
I used similar techniques in some steps that I have already outlined in other places on this site, so to avoid rehashing the information I will begin this page with the actual assembly of the cage.
My apologies for the lack of a materials list and such. I believe this was just the second such page I wrote and hadn't worked out my format yet. The page was originally written in 2001 and the cage shown here and another like it are still in use today 15 years later.
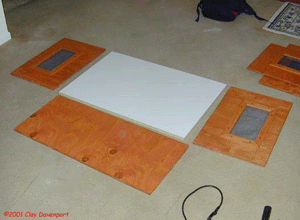
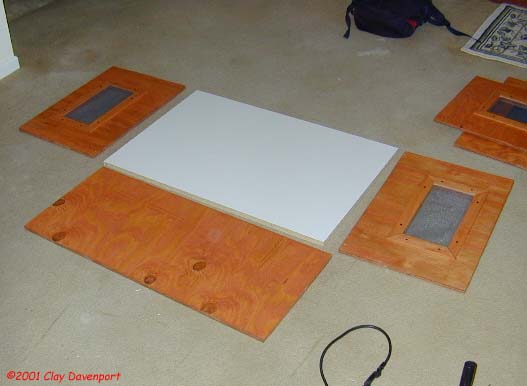
This picture shows the first step in the assembly. The sides and back are already cut and stained, and the vent windows are finished. The ventilation windows were cut out with a jig saw and covered with black aluminum window screening, then framed with latice strips. These vents are designed the same as in another cage I have built, and if you would like to see a detailed description of how they are done, you can click here.
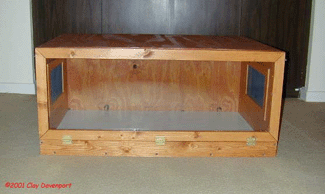
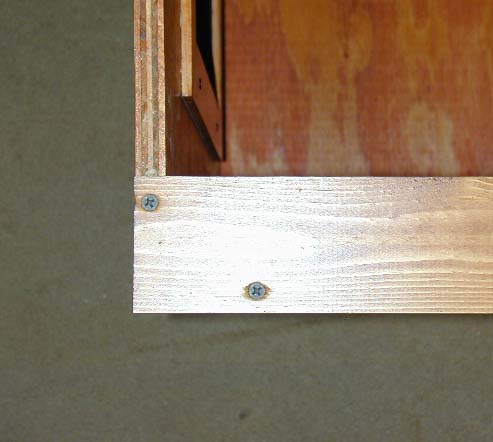
The bottom is melamine and measures 3'x 2'. I like melamine bottoms for their moisture resistance.
The sides measure 24"x 16", and the back measures 37"x 16". All of the wood used in this cage was stained with Minwax Colonial Maple oil based stain and sealed with 2-3 coats of satin finish polyurethane, then allowed to cure for nearly a month. The extended curing time was due to the winter temperatures and my own lack of time to devote to the cage construction. I normally like to let my stained cages cure in the direct sun for at least 5 days before putting them into use.
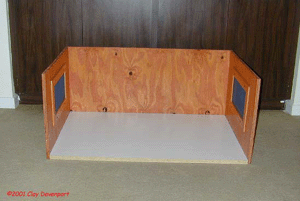
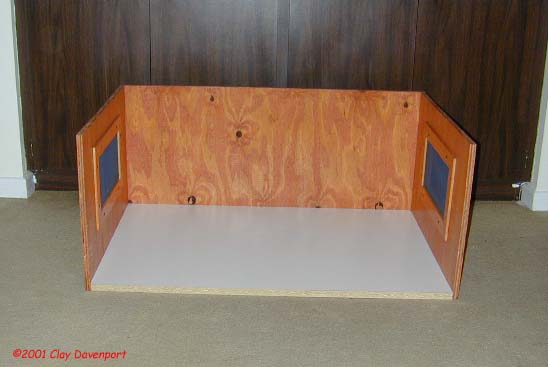
The top, which I realized too late that I failed to take a picture of, measures 37"x 24.5" and was screwed down on top of the walls of the cage.
Making the framed door
These doors are not as hard to construct as they may seem, if you have the proper tools.
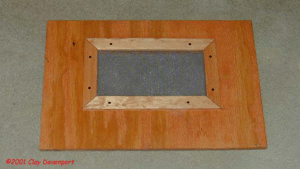
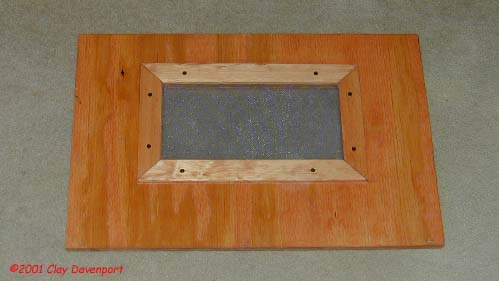
The door frames are made from 3/4" thick 2" strips and were made in the style of a picture frame. I purchased these pieces in 8 foot lengths at Lowe's and ripping them to width was not necessary. The door pieces were mitered on 45° angles using a power miter saw. A hand miter box can be used equally as well.
Before assembling the pieces of the doors, a recess for the glass to lay in was cut with a router. You will be able to see the recess in photos further down the page.
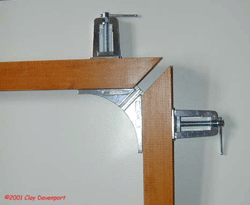
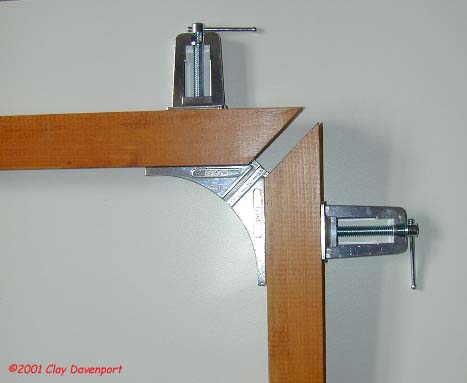
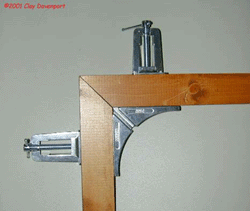
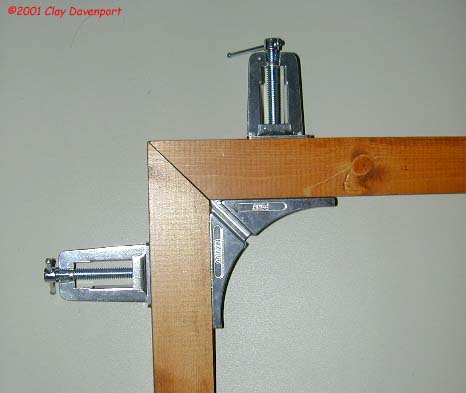
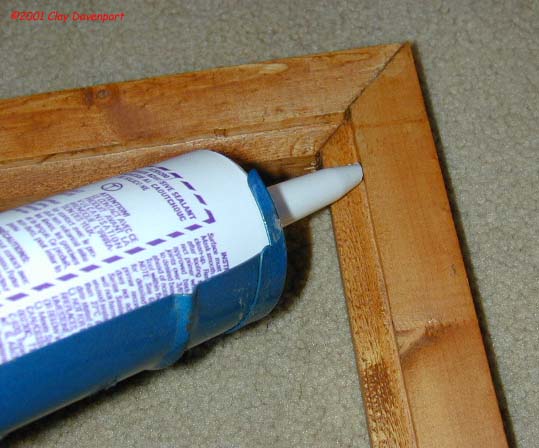
To assemble the door frames I used a 90° clamp to hold the peices in place. These clamps are around $6 at Lowe's and I have found them to be invaluable in making these joints. A bead of wood glue was used in each corner, and the two pieces clamped in place. I then drilled 2 pilot holes one from each direction and offset from each other as shown in the following pictures.

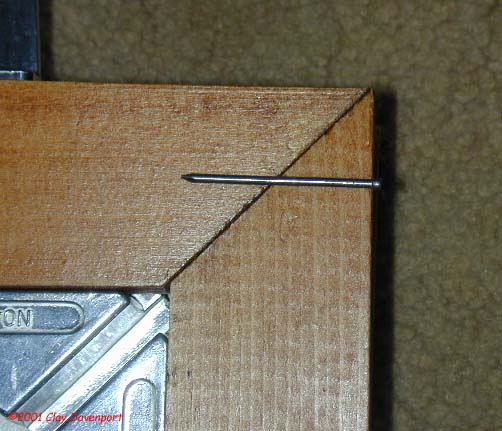
The corner was nailed with finishing nails to hold it securely. Offseting the nails is important to avoid hitting one nail with the other. I let each joint dry for 30 minutes before removing the clamp.
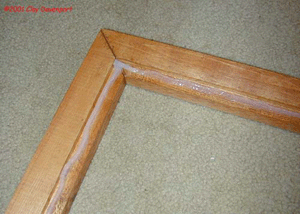
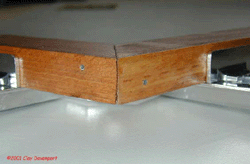
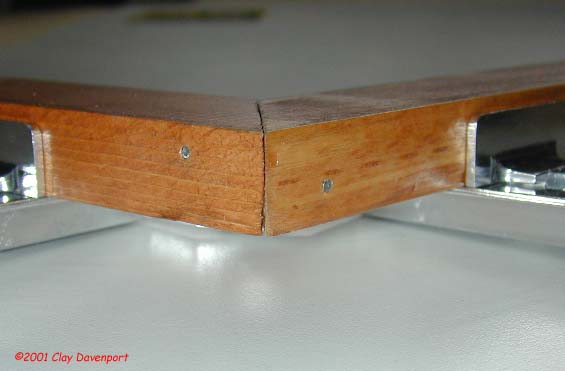
In these pictures you can see the recess in the door frame that the glass will lay in. The recess was cut using a router, and it is 1/2" wide and 1/4" deep so that the glass fits flush into it.
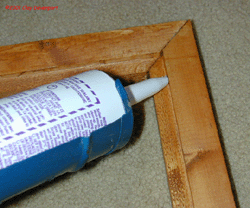
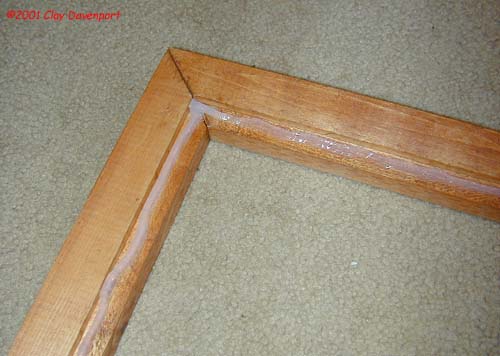
A bead of silicone was run in the recessed area to hold the glass securely. Once the silicone was applied the glass was put in place and a heavy board was laid on it for weight, and to make sure the glass laid down evenly. Due to the cooler temperature, I left the doors for 48 hours so the silicone was completely dry before hanging them.
Hanging the doors
The next step was to hang the doors. I started by installing the substrate dam. This dam is 3" wide and serves two purposes. First to hold in any loose substrate when the door is opened, and second, to give me a good place to hinge the door. I have been using this method of hanging doors in several forms for years, and have found it to be very suitable.


I normally prefer to use finishing nails for the substrate dam, but I decided the weight of the doors would be better supported with wood screws. They don't provide as nice of a finished look, but I also didn't want to risk seperating the dam from the cage after a couple of years of opening and closing the door.